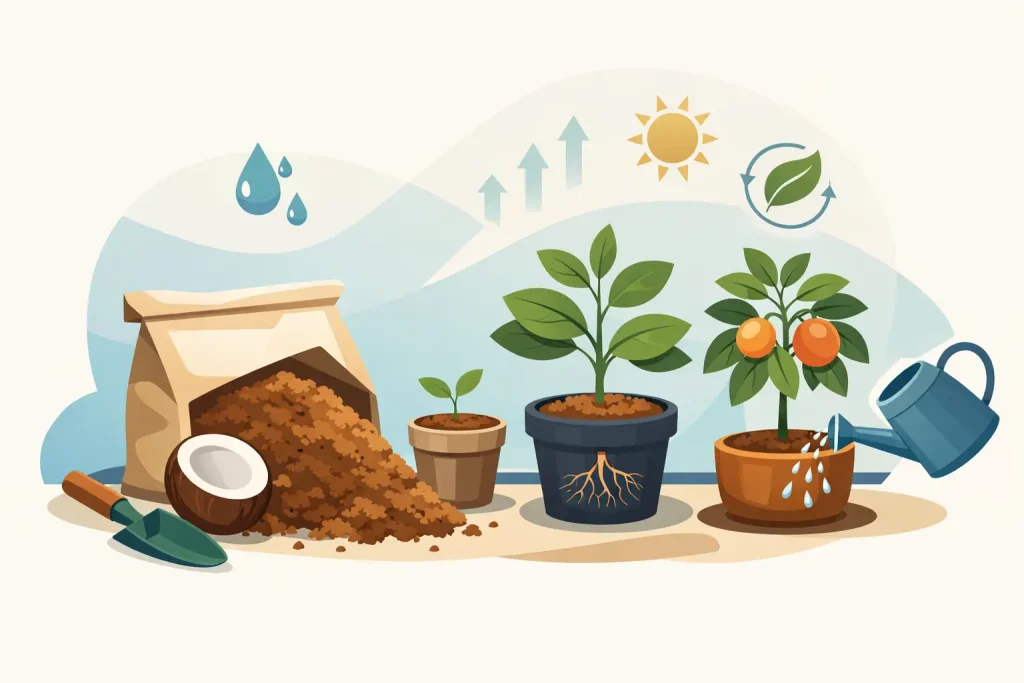
Coco coir can make a grow run easier or harder depending on how you treat it. Growers who struggle with it usually make the same mistakes – feeding it like soil, letting it dry too far back, or skipping prep on lower-grade material. If you want to know how to use coco coir properly, the key is to treat it as a fast-draining, high-oxygen medium that needs regular feeding and tighter irrigation control.
What coco coir actually does well
Coco sits in the middle ground between soil and hydro. It holds more air than heavy compost, drains faster, and gives roots easy access to water and nutrients. That is why it is popular in hand-watered pots, dripper systems, run-to-waste setups and automated irrigation rooms.
For indoor growers, the main advantage is control. You get quicker root development than in most soils, faster recovery after transplant, and fewer problems with overwatering as long as the pot size, air movement and irrigation frequency are sensible. Coco also works well with mineral nutrients designed for soft, frequent feeding.
The trade-off is that coco is less forgiving if you underfeed or let the root zone swing too much. It is not a medium you can soak once and ignore for days, especially under strong lighting and active extraction.
How to use coco coir from the start
Not all coco is prepared to the same standard. Good-quality buffered coco is ready to hydrate and use with minimal work. Cheaper compressed bricks or poorly processed loose-fill coco may contain excess salts or have an unstable cation balance, which can tie up calcium and magnesium early on.
If you are using premium, pre-buffered coco, you can usually hydrate it, break it up fully, and fill pots straight away. If the product is not clearly buffered, it is safer to rinse and pre-soak it with a light nutrient solution that includes cal-mag. That step helps charge the medium before roots go in.
When hydrating compressed coco, use enough water to expand it fully and break apart dry pockets. Dry cores left inside the pot can create uneven moisture levels later. The finished texture should be light, open and evenly moist, not muddy or compacted.
Buffered vs unbuffered coco
This matters more than many growers expect. Coco naturally holds onto certain positively charged ions, especially calcium and magnesium. If the medium has not been properly buffered, your feed can get stripped in the root zone and the plant will show deficiency symptoms even when the tank looks correct.
Buffered coco reduces that risk and gives you a more stable start. Unbuffered coco can still be used, but it needs more preparation and usually a closer eye in the first two weeks.
Pure coco or coco with perlite
Pure coco works well in many setups, especially when pot size and watering frequency are dialled in. A coco-perlite blend drains faster and increases air-filled porosity, which can help in larger pots, cooler rooms or for growers who prefer more frequent irrigation.
There is no single right answer. If your room runs warm and plants are drinking hard, straight coco may hold enough moisture without becoming sluggish. If you want a faster dry-back and a more forgiving root zone, adding perlite is often worthwhile.
Feeding in coco is not the same as feeding in soil
The biggest adjustment when learning how to use coco coir is understanding that coco is usually fed little and often. In soil, the medium itself contributes more nutrient buffering. In coco, the plant relies much more on what you supply through irrigation.
That means a dedicated coco nutrient line is usually the safer option. These feeds are formulated with the calcium, magnesium and micronutrient balance that coco-grown plants generally need. You can use standard hydro nutrients in some cases, but you need to know exactly how the formulation behaves in coco rather than assuming it will be fine.
Seedlings and cuttings should start on a mild feed. Once roots are established, increase strength gradually based on plant response, environmental demand and irrigation frequency. Pushing EC too hard in coco can lead to salt build-up, but feeding too lightly often causes pale growth and slow development.
pH control matters as well. Coco performs best in the hydro range rather than the typical soil range. If your pH drifts too far, nutrient uptake becomes less efficient and deficiencies can show quickly.
Watering coco properly
Coco should stay evenly moist, not saturated and not bone dry. Letting it dry back too far stresses roots, concentrates salts and makes the next irrigation less effective. That is why experienced coco growers water based on root mass, pot size, room conditions and plant demand rather than following a fixed calendar.
In the early stage, small plants in large pots are easy to overwater if the whole container is drenched repeatedly. The better approach is to water around the active root zone and expand coverage as the plant establishes. Once the pot is rooted out, more frequent irrigations become an advantage rather than a risk.
For mature plants under strong light, daily feeding is common. In high-demand rooms, multiple irrigations per day can be the better option. The medium performs best when fresh nutrient solution moves through it regularly and a small amount of runoff helps prevent salt accumulation.
How much runoff do you need?
In most coco setups, some runoff is useful. It helps pull old salts from the root zone and keeps the media chemistry more stable. Too little runoff over time can lead to rising EC in the pot, especially in flower when plants are drinking heavily.
That said, runoff management depends on the system. In hand-watered pots, moderate runoff is straightforward. In automated rooms, you need trays, drainage and waste handling that can keep up. Poor drainage undercuts the benefit of coco very quickly.
Pot size, irrigation and system choice
Coco is flexible enough for hand watering, drippers and recirculation-style approaches, though many growers prefer run-to-waste for simplicity and control. Smaller pots with frequent irrigation often outperform oversized containers that stay wet for too long. Faster root-zone turnover usually means better oxygen availability and more consistent feed delivery.
If you are hand watering, fabric pots can improve air pruning and drainage, but they also dry faster. Standard plastic pots retain moisture longer and may suit growers who cannot irrigate as often. In either case, a proper saucer or tray setup matters if you want clean runoff management.
Dripper-fed coco is where the medium really starts to show its strengths. Once irrigation timing is tuned, growth can be fast and predictable. The downside is that poor dripper uniformity, blocked lines or inconsistent pressure will show up in plant performance quickly.
Common problems when using coco coir
Most coco issues come back to prep, feed balance or irrigation habits. If leaves are pale early on, especially with rusty spotting or weak new growth, think calcium and magnesium first, then check whether the medium was buffered correctly. If tips are burnt and runoff EC is climbing, feeding is probably too aggressive or runoff is too low.
If plants look droopy in constantly wet pots, do not assume they need more water. In coco, droop can come from poor oxygen levels as well as drought stress. Pot size, temperature and irrigation frequency all need checking together.
Fungus gnats can also turn up if the top layer stays wet and organic debris is left around the room. Clean working practices, decent airflow and controlled moisture levels go a long way.
Can you reuse coco?
Yes, but only if you are prepared to process it properly. Used coco needs roots removing, salts flushing out, and the buffer condition restoring before another crop. For small runs, fresh coco is often the cleaner option. For larger operations, reuse can make sense if your workflow is consistent and hygiene standards are high.
How to use coco coir for seedlings and cuttings
Young plants usually do well in coco because it offers excellent air to water balance, but the feed strength must stay light. A common mistake is treating fresh cuttings like established vegging plants. Keep the medium moist, the EC conservative, and the environment stable while roots form.
Starter plugs can be transplanted into small coco pots once roots show through. From there, step up pot size before the plant becomes rootbound. That staged transplant process usually gives better control than putting a small plant straight into a large final container.
For propagation rooms, consistency matters more than speed. If one tray dries faster than another because airflow is uneven or irrigation is patchy, rooting times will vary and so will early plant structure.
Is coco right for every grower?
Not always. If you want a medium you can water infrequently and leave alone, soil may suit you better. If you want more control, quicker growth and compatibility with automated feeding, coco is often the better choice. It rewards attention and punishes sloppy routine.
That is really the answer to how to use coco coir well: start with quality media, buffer if needed, feed it like a hydro medium, keep the root zone evenly moist, and build your irrigation around actual plant demand rather than guesswork. Get those basics right and coco becomes one of the most reliable media in the room.
If your setup is already built around precision – good drainage, stable climate, proper nutrient control and sensible irrigation timing – coco will usually meet you halfway.