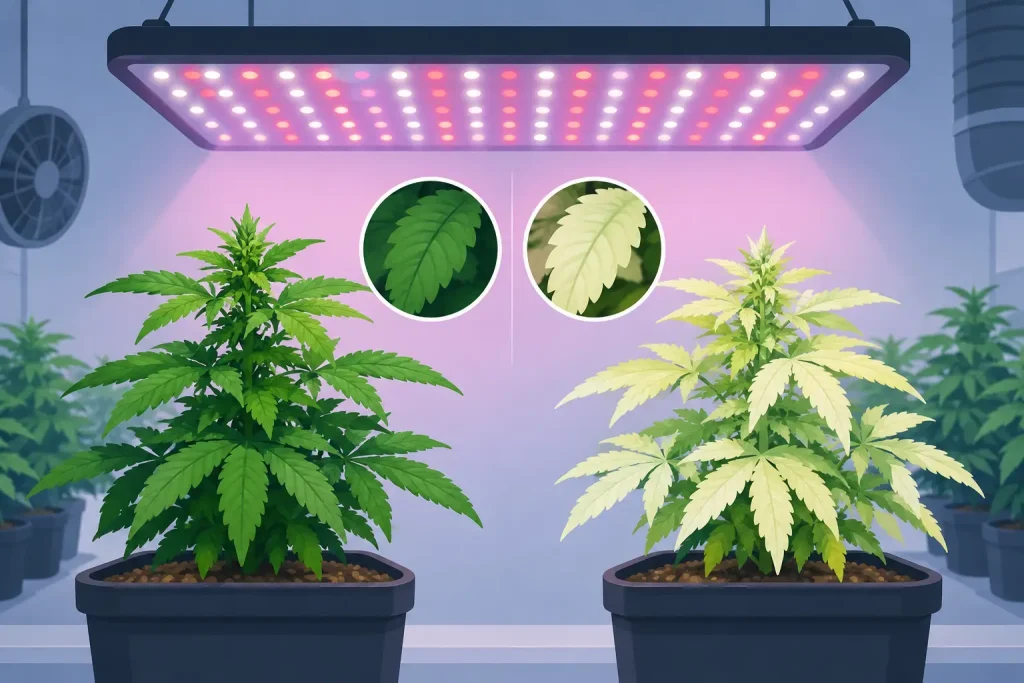
A pale patch on the highest leaves is not a cosmetic issue to ignore. Does LED light cause bleaching? Yes, it can – but the diode itself is rarely the whole problem. In most grow rooms, bleaching happens when the canopy receives more usable light than it can process, often alongside poor leaf-temperature control, weak airflow or an unsuitable feed.
LED fixtures can deliver very high PPFD directly over the canopy while producing less obvious radiant heat than older lighting. That makes it easy to underestimate the stress level at leaf surface. A plant may look comfortable at room level while the uppermost growth is receiving excessive intensity for its stage, cultivar, root-zone condition or environmental set-up.
What LED bleaching looks like
True light bleaching normally starts at the points nearest the fixture. The newest top growth turns pale green, yellow-white or almost white, while lower leaves remain a healthier shade. In more severe cases, the affected tissue becomes dry, papery or develops brown necrotic areas at the edges.
This is different from a uniform nitrogen deficiency, which tends to begin on older lower leaves, and different from interveinal chlorosis, where leaf veins often remain greener than the tissue between them. Bleached tops are usually localised to the highest points of the canopy, particularly directly below the centre of a powerful LED bar or board.
Plants use chlorophyll to capture light. When incoming light exceeds the plant’s capacity to use that energy in photosynthesis, the photosynthetic machinery is damaged faster than it can recover. Pigments break down, chlorophyll production is disrupted and the leaf loses colour. If the exposure continues, growth slows and the damaged tissue will not return to normal.
Why LEDs can cause bleaching
The relevant measurement is not simply fixture wattage. It is PPFD – photosynthetic photon flux density – at canopy height, combined with the number of hours the light runs each day. Together, they determine daily light integral, or DLI.
A modern horticultural LED can produce a high photon output over a focused footprint. Hanging it too low, running it at full power from early growth or allowing one tall section of canopy to sit close to the fixture can push the top leaves beyond their workable limit. This is particularly common after a vigorous stretch, when plants gain height faster than the lighting position is adjusted.
Spectrum can also affect how plants respond. High-efficiency full-spectrum fixtures usually contain a substantial amount of blue light, which can produce compact growth but may feel more intense to plants at close range. Fixtures with added far-red can alter plant structure and canopy development. Neither spectrum is automatically harmful, but intensity, distance and crop response must be managed as one system.
Environmental conditions decide whether plants can make use of high light. A strong LED over a canopy with poor air movement, low humidity, a restricted root zone or an unstable nutrient solution can create bleaching conditions at levels that might otherwise be manageable. Light is the engine, but the roots, temperature, CO2 availability and transpiration have to keep up.
LEDs run cooler, but leaf stress can still rise
A common mistake is assuming low fixture heat means there is no heat-related stress. LEDs radiate less heat towards leaves than HID lamps, but high photon density still increases the work a leaf has to do. Meanwhile, powerful LEDs can leave leaf temperatures lower than the surrounding air, especially under heavy extraction or direct fan flow.
If leaf temperature is too low, transpiration and nutrient movement may slow. If it is too high, water loss can outpace uptake. Both situations reduce the plant’s ability to tolerate intense light. Check canopy conditions, not just the reading on a controller mounted elsewhere in the tent or room.
How to tell bleaching from nutrient lockout or pest damage
Before changing equipment, inspect the pattern. Light bleaching is strongest on the upper canopy and follows the fixture footprint. Move a plant or raise the light, and healthy new growth should emerge with better colour over the following days. Existing white tissue will not turn green again.
Nutrient lockout can also show at the top of plants, particularly with calcium, iron or manganese issues. However, it commonly appears as distorted new growth, spotting, defined vein patterns or symptoms across areas that are not directly under the brightest zone. Check root-zone pH, EC and irrigation practice before adding more feed. Increasing nutrient strength to correct a light problem can make matters worse.
Pest damage tends to show stippling, silvering, webbing, leaf distortion or visible insects on the underside of leaves. Disease and spray damage can also produce pale areas, but they do not usually form a neat pattern on the highest leaves below the light. Take a close look before diagnosing from colour alone.
Correcting LED bleaching without losing momentum
The first correction is usually to reduce light stress. Raise the fixture, dim it, or do both. For a large multi-bar fixture, use the manufacturer’s hanging-height guidance as a starting point, then adjust according to measured PPFD and crop response. Do not make a drastic environmental change every day. Give the plants enough time to show whether the correction is working.
A PAR meter is the most reliable way to establish what the canopy is receiving. Without one, use fixture output data, hanging-height guidance and a cautious approach to dimming. Mobile phone-based light meter apps can give a rough indication but should not be treated as accurate PAR readings under horticultural LEDs.
For many leafy crops, a moderate vegetative canopy may perform well around 200-400 µmol/m²/s. Fruiting and flowering crops can often use more, commonly in the 500-800 µmol/m²/s range, but the suitable level depends on crop type, maturity, photoperiod, temperature, nutrition and CO2 management. More light is only productive when the rest of the environment supports it.
Level the canopy where possible. A single tall plant can bleach while the rest of the crop is underlit. Trellising, topping, training and sensible plant spacing help create an even working distance from the fixture. In a tent, rotate pots if one edge receives substantially less intensity than the centre, but do not use rotation as a substitute for correct coverage and hanging height.
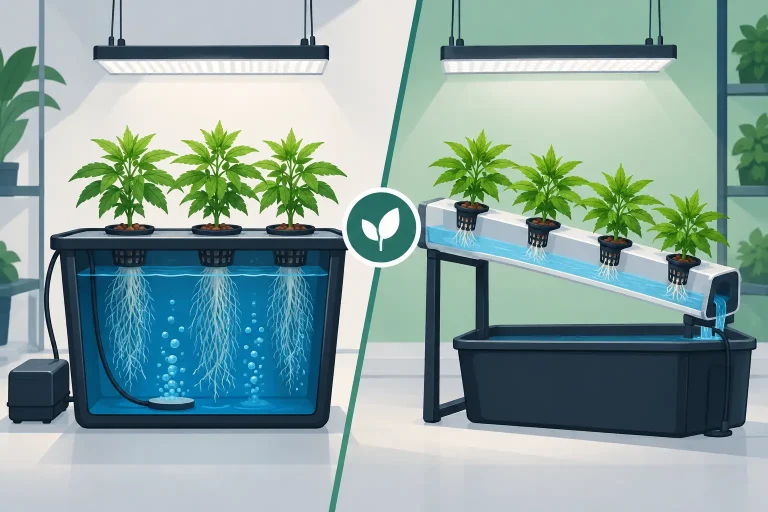
Check extraction, circulation and humidity at canopy level. Fans should keep leaves moving lightly rather than blasting one section continuously. Direct airflow can cool leaf surfaces excessively and cause edge damage that complicates the diagnosis. Stable root-zone moisture and correct nutrient solution temperature are equally useful, especially in recirculating hydroponic systems.
A practical LED set-up routine
When installing a new fixture or moving plants into a brighter area, begin below full output. Increase intensity in measured steps as the canopy establishes, watching the newest leaves rather than relying on older foliage. Keep a record of fixture height, dimmer setting, room temperature and feed strength. This makes troubleshooting far quicker than changing several variables at once.
Use the light spread, not the fixture’s maximum rating, to plan your space. A powerful LED hung high may give more even coverage across a full tent, while the same unit at maximum output and low height can create a central hotspot with weak corners. Uniform PPFD is generally more useful than an extreme reading at one point.
For propagation and young plants, keep intensity conservative. Their root systems and leaf area are limited, so they cannot use the same light levels as a fully established crop. As plants mature, increase output gradually and retain enough clearance to accommodate stretch.
When bleaching is not caused by the light
If the affected leaves are not concentrated near the fixture, investigate other causes. Excessive EC, incorrect pH, irregular watering, root disease, cold nutrient solution, calcium availability and overuse of foliar products can all damage new growth. Some sprays and additives can leave residues or cause phytotoxicity when applied under strong light, even if the label rate was followed.
There is also a genetic element. Some varieties and crop types are more sensitive to high intensity or sudden environmental change. Treat manufacturer PPFD figures as operating potential, not a demand every plant must meet. The best setting is the one that maintains healthy leaf colour, steady growth and even development across the canopy.
Bleaching is a useful warning sign: the crop is telling you the lighting system is outpacing the environment. Reduce the stress, stabilise the room and let clean new growth guide the next adjustment. A dimmer, correct hanging height and a properly managed canopy will usually deliver more usable growth than running an LED flat out.