A weak start in propagation costs time later. Slow rooting, wilted cuttings and patchy tray results usually come down to handling, hygiene or poor stem preparation, not just genetics. If you’re looking at how to use cloning gel, the goal is simple: seal the cut site, support early root initiation and give every cutting the best chance of establishing quickly.
Cloning gel is a propagation aid designed for fresh cuttings. It coats the stem, helps protect the wound from air exposure and contamination, and usually contains rooting hormones that encourage root development. In a controlled indoor setup, that extra consistency matters. When you’re filling a propagator tray, small mistakes multiply fast.
How to use cloning gel step by step
Start by getting the environment ready before you take a single cutting. Your propagator, plugs or cubes, scalpel or scissors, labels and cloning gel should all be set out first. If the stem is cut and then left exposed while you organise the tray, you’ve already reduced your margin for success.
Use a clean mother plant with healthy, turgid growth. Soft, weak or nutrient-stressed shoots root more slowly and collapse more easily under propagation humidity. Aim for cuttings with a firm stem and a couple of healthy leaf sets, usually around 7 to 15 cm long depending on the plant type.
Take each cutting with a clean blade. Many growers make the final cut at a slight angle to increase the exposed rooting area, although a clean straight cut can still work well if the rest of the process is sound. The key point is speed. As soon as the cutting is removed, dip the stem into cloning gel straight away. That immediate dip helps stop air entering the stem and coats the wound while it’s fresh.
Only dip the lower part of the stem – enough to cover the section that will sit inside the propagation plug or medium. You do not need to coat half the cutting. Too much gel can be messy, waste product and reduce good contact between stem and plug.
Once coated, place the cutting directly into a pre-made hole in your rooting cube, plug or propagation medium. Don’t force a gel-coated stem into a dry, tight hole without preparing it first, because the gel will scrape off. The stem should slide in with minimal resistance, then sit snugly with good contact around it.
After inserting the cutting, gently firm the medium around the stem if needed. Then place it into the propagator under suitable humidity and mild light. At this stage the gel has done its job, but environmental control now determines whether rooting actually progresses.
Getting the rest of propagation right
Anyone asking how to use cloning gel properly also needs to look beyond the bottle. Gel helps, but it does not fix poor propagation conditions.
Humidity needs to be high enough to reduce water loss while the cutting has no roots. That usually means using a proper propagator with a lid, especially in the first few days. At the same time, avoid turning the tray into a stagnant, overheated box. Warm root-zone conditions help, but excessive heat drives stress, stem rot and collapse.
Light should be gentle rather than intense. Fresh cuttings are not established plants and do not want full-power LED output. A low-intensity propagation light or a raised dimmed fixture is usually more appropriate. Too much light increases transpiration and pushes cuttings to wilt before roots can form.
Moisture in the plug or cube should be balanced. Saturated media slows oxygen availability and raises the risk of rot. Over-dry media causes the stem base to dehydrate and stall. You’re aiming for evenly moist, not dripping.
Air exchange matters as well. Very high humidity is useful early on, but some venting helps reduce fungal pressure and harden cuttings gradually as roots begin to form. The exact timing depends on species, room conditions and how quickly the cuttings respond.
Common mistakes when using cloning gel
The most common error is contamination. If you’re repeatedly dipping stems into the original container, you can introduce plant material and pathogens into the gel. A better method is to pour a small working amount into a separate sterile cup and discard anything left over. That keeps the main product clean for the next run.
Another issue is taking poor-quality material. Cloning gel cannot compensate for weak mother stock, overfed plants, pest pressure or dehydrated shoots. If the donor plant is not in good condition, rooting rates usually show it.
Leaf mass is another balancing act. Large leaves increase transpiration, so many growers trim leaf tips to reduce moisture loss. Go too far, though, and you reduce the cutting’s ability to photosynthesise. You’re trying to lower stress, not butcher the cutting.
Depth in the plug also matters. If the stem sits too shallow, it may dry out or wobble. Too deep, and the buried tissue may soften and rot, especially in very wet media. Keep the gelled section covered and stable, but don’t bury unnecessary stem length.
Then there is impatience. Tugging on cuttings to check roots, opening the propagator constantly or moving trays around under different lights creates avoidable stress. Once the tray is set correctly, consistency usually beats interference.
Choosing a medium for cloning gel
Cloning gel works across several propagation formats, but your medium still affects results. Rooting plugs are popular because they offer good moisture retention, decent air space and easy transplanting into coco, soil or hydro systems. Rockwool cubes are also common in indoor cultivation, though they need correct pre-soaking and drainage to avoid staying too wet.
Some growers use peat-free plugs or foam propagation media, especially where cleanliness and uniformity are priorities. In all cases, the principle stays the same: make a pilot hole first, dip the stem, insert without scraping the gel away, then keep the medium evenly moist.
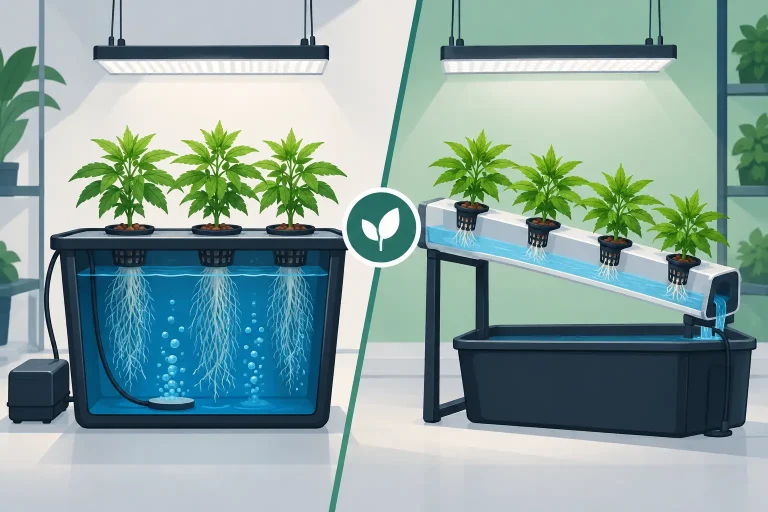
If you’re transferring clones into hydroponic systems later, try to keep the transition simple. A cutting that roots in a stable plug often moves more cleanly into net pots, clay pebbles or other hydro formats than a cutting started in an unsuitable medium. Propagation is not a separate job from the rest of the crop cycle. It sets up everything that follows.
How long cloning gel takes to work
Cloning gel does not produce roots overnight. Depending on plant variety, stem maturity, temperature and overall propagation conditions, visible rooting can take several days to a couple of weeks, sometimes longer. Fast-rooting plants may show early development quickly, while woodier or more temperamental varieties need patience.
What you should watch for first is not explosive root growth but stability. A cutting that stays upright, holds leaf turgor and keeps its colour is usually on the right track. Yellowing, stem collapse, blackening at the base or persistent wilt point to a process issue, whether that’s hygiene, temperature, light intensity or moisture management.
How to use cloning gel for better consistency
If you’re running cuttings regularly, standardise the process. Use the same mother plant conditions, similar shoot size, the same blade type, the same plug moisture and the same propagator settings each run. Propagation becomes much easier to troubleshoot when variables are controlled.
It also helps to work in batches without rushing. Cut a manageable number of shoots, dip each one immediately, insert them cleanly and label trays properly. If you’re handling multiple cultivars, poor labelling causes problems that no propagation product can solve later.
For higher-volume growers, success often comes from repeatable workflow rather than any single additive. Cloning gel is part of that workflow. It supports rooting, but only when matched with clean technique and stable environmental control.
Store the gel according to the label, keep the lid closed when not in use and avoid exposing it to excessive heat or contamination. A product that’s been handled badly can lose reliability, and propagation is not the stage where most growers want guesswork.
When used properly, cloning gel is a simple but worthwhile tool. It improves the odds at the point where a fresh cutting is most vulnerable, and that can make the difference between a tray of viable young plants and a tray of replacements. Treat propagation like a production step, not an afterthought, and your results usually tighten up fast.