A propagation tray can look warm enough while the rooting zone is still too cold. In an unheated room, on a concrete floor or beside an intake, that difference can slow germination, stall callus formation and leave young plants uneven from day one. This propagation heat mat guide covers how to apply bottom heat properly: not by running a mat at full power and hoping for the best, but by controlling root-zone temperature around the crop.
Heat mats are most useful during the earliest stage, when seed trays, plugs and cutting media have little thermal mass and lose heat quickly. They are a propagation tool, not a substitute for suitable room temperature, humidity, airflow or hygiene. Used with a thermostat and a correctly placed probe, they provide a more consistent start and make propagation less dependent on seasonal temperature swings.
What a propagation heat mat actually does
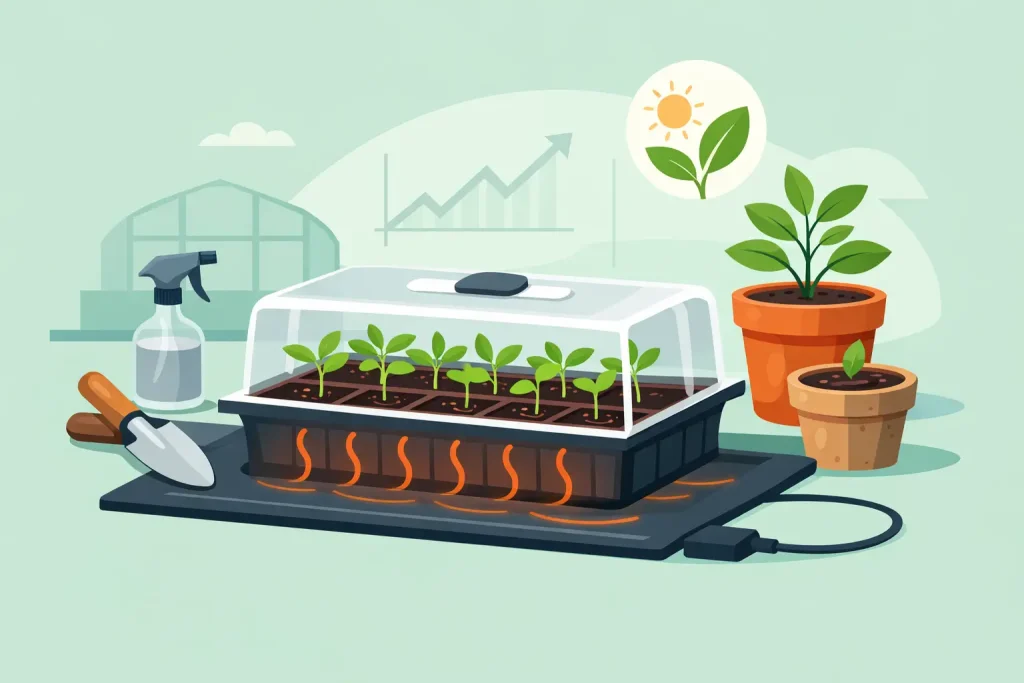
A heat mat warms the base of a propagation tray or small pot. This raises media temperature ahead of air temperature, encouraging seeds to germinate and cuttings to form roots. The benefit is consistency. Even a well-managed grow room can have cold night periods or draughts that reduce root-zone temperature below the useful range.
The mat does not heat every plug to exactly the same temperature by itself. Tray depth, media moisture, cell size, a humidity dome and the surrounding air all affect the result. A thin tray with wet plugs conducts heat differently from a deep tray of dry coco. Treat the mat as a heat source that needs control, not as a fixed-temperature appliance.
For most indoor growers, a waterproof horticultural mat paired with a separate digital thermostat is the sensible setup. The thermostat prevents overheating and allows the same mat to be used across seed sowing, cloning and early establishment.
Choose the right mat size and controller
Match the heat mat to the footprint of the tray rather than buying the largest unit available. A mat should support the active tray area without being folded, cut or overlapped. A small propagator tray on an oversized mat may develop warmer edges or waste power, while several trays placed partly off a small mat will root at different speeds.
For a single standard propagator, a compact mat is normally enough. Larger operations may use several matched mats, each with its own tray, or a larger bench-style unit. Separate zones are useful where different crops need different temperatures. Seedlings and freshly taken cuttings do not always want the same conditions.
A thermostat is the key component. Basic mats often run continuously when plugged in, and surface temperatures can climb well above what tender roots need. A digital thermostat with a waterproof probe gives you a set point, an actual reading and repeatable control. If a controller has a large switching differential, the media may fluctuate more than expected, so check the specification before fitting it into a high-value propagation area.
Do not place insulation directly between the mat and tray unless the manufacturer permits it. It may reduce heat loss downwards, but it can also trap heat and change how the mat performs. Put the mat on a flat, dry, stable surface, keep electrical connections clear of spills and follow the supplied safety instructions.
Propagation heat mat guide: setting the temperature
The useful measurement is media temperature, not the temperature printed on the thermostat display from a probe hanging in the air. Insert the probe into a representative plug or rooting medium, ideally near the centre of the tray. It should be in contact with the moist medium, not pressed against the mat beneath the tray.
As a working range, many seeds and cuttings perform well with root-zone temperatures between 20°C and 25°C. The right target depends on the crop and propagation method. Cool-season herbs and vegetables may prefer the lower end, while warmth-loving crops often germinate more readily toward the upper end. For cuttings, 22°C to 24°C is a practical starting point for many common indoor plants, provided humidity and light are also controlled.
Avoid assuming that warmer equals faster and better. Media held above the crop’s preferred range can encourage damping-off pathogens, reduce oxygen around saturated roots and stress unrooted cuttings. Very warm, wet propagation plugs are one of the quickest ways to lose a tray that initially looked promising.
Set the controller, allow the system to stabilise for several hours, then verify it with a separate probe thermometer if possible. Check the centre and outer cells. If the edges are consistently cooler, improve the surrounding environment or reduce exposure to draughts before increasing the thermostat setting.
Running times, humidity and lighting
Most growers run a controlled heat mat continuously because the thermostat cycles power only when the media drops below the set point. This maintains a stable rooting zone through day and night. Switching the mat off every night can work in a warm room, but it often creates unnecessary temperature swings in a tent, garage or cooler utility space.
Humidity needs to match the propagation material. Germinating seeds generally need evenly moist media and a humid environment, but not dripping plugs. Fresh cuttings need higher humidity while they have no roots to replace lost water. A propagator lid can help, although it should be vented progressively once cuttings begin to establish. Standing water in the tray, especially over a warm mat, is not a humidity strategy.
Keep propagation lighting modest. Young seedlings and unrooted cuttings need enough light to remain compact and begin photosynthesis, but excessive intensity raises leaf temperature and drives transpiration. Position a suitable propagation light at a sensible height and adjust it as plants develop. Strong lighting, high media heat and a sealed humidity dome can create more stress than growth.
Air exchange still matters. Open vents or briefly lift the lid to refresh the air and remove condensation, particularly when the mat is running. Once roots appear, gradually lower humidity and strengthen airflow so plants harden off before moving into a higher-light vegetative area.
Using heat mats for seeds and cuttings
For seeds, fill trays evenly and firm the media lightly so every cell has similar contact with moisture and heat. Sow to the appropriate depth, label each variety and water carefully. A heat mat is particularly valuable for uneven or slow-germinating batches, but do not leave emerged seedlings under a closed dome simply because other cells have not yet germinated. Remove or ventilate the cover as soon as the majority are through.
For cuttings, start with clean tools, fresh rooting medium and a clean tray. Take healthy material, make the cut cleanly and use your chosen rooting gel, powder or solution according to its directions. Insert each cutting firmly enough that the stem contacts the plug, then place the tray on the mat after misting only as needed.
Bottom heat helps cuttings prioritise root development, but it cannot correct poor stock-plant health, weak sanitation or a badly managed environment. If leaves yellow, wilt or rot, check media moisture, humidity, light level and tray cleanliness before raising the temperature.
Common heat mat problems and practical fixes
If seedlings are leggy, the mat is rarely the main cause. Check that they have enough light after emergence and that the propagator is not excessively warm. If germination is poor, verify actual media temperature and moisture before blaming the seed.
If the tray is drying out too quickly, inspect airflow and light intensity. A warmer root zone increases evaporation, so plugs may need more frequent checks, but they should not be constantly saturated. Water little and often where appropriate, and allow excess water to drain rather than leaving cells sitting in a flooded base.
If cuttings are wilting despite high humidity, the issue may be excessive leaf temperature, overly strong lighting or a poor seal around the stem in the plug. If stems are soft or collapsing, lower the risk factors: reduce moisture, improve hygiene, increase fresh-air exchange and make sure the mat is not running too hot.
Check these points before every new batch:
- The thermostat probe is in the rooting medium, not loose in the propagator.
- The tray sits fully and flatly on the mat without covering electrical connections.
- Plugs are evenly moist, with no standing water in the tray base.
- The dome, vents and lighting are adjusted as roots and shoots develop.
A heat mat earns its place when it produces predictable propagation, not when it makes the tray feel hot. Measure the root zone, keep the environment clean and stable, then reduce heat and humidity gradually as each plant becomes capable of growing on under normal vegetative conditions.