A light that looks powerful on a product page can still leave the corners of a tent underlit, bleach the top canopy, or add more heat than your extraction can handle. Selecting LED lights is not simply a matter of buying the highest wattage fixture available. The right unit has to match the crop area, canopy depth, plant stage and the rest of the environmental equipment in the room.
For indoor growers, modern LED fixtures offer strong efficiency, lower radiant heat than older HID systems and the ability to run a more controlled lighting schedule. Those benefits only show up when the fixture is sized, positioned and managed properly.
Start With the Growing Area
Measure the usable canopy area, not just the floor dimensions of the tent or room. A 1.2 m x 1.2 m tent may not have a full 1.44 m² of plant canopy once fans, ducting, reservoirs and access space are accounted for. This matters when comparing a single bar fixture with a smaller board-style unit or several modular lights.
Coverage claims are useful as a starting point, but check which crop stage they refer to. A fixture may cover a larger area for propagation or vegetative growth, then require a smaller footprint to deliver suitable intensity for heavy fruiting and flowering crops. Running a light designed for a 1.2 m x 1.2 m flowering footprint over a 1.5 m x 1.5 m canopy will usually produce a strong centre and weaker edges.
For larger rooms, multiple fixtures often make more sense than one central high-output lamp. They give more even distribution, allow separate zones to be dimmed or raised, and make it easier to maintain a consistent canopy as plants are moved through the room.
Think in PPFD, Not Marketing Watts
Watts tell you what a fixture draws from the mains. They do not tell you how much usable plant light reaches the canopy. PPFD, measured in micromoles per square metre per second (µmol/m²/s), is the more useful figure because it measures photosynthetic photon flux density at plant level.
Young plants and fresh cuttings need modest intensity. A high-output fixture set too close can slow rooting, curl leaves or cause bleaching before the plants have established. Vegetative plants can accept more light, while high-light flowering and fruiting crops generally need the strongest, most even output – provided nutrition, irrigation, temperature and carbon dioxide levels can support it.
As a working guide, growers often aim for roughly 100-300 µmol/m²/s for propagation, 300-600 for vegetative growth and 600-900 for productive flowering without added CO2. Some crops and advanced sealed-room setups can run higher, but intensity is not a free yield increase. If root-zone conditions, feed strength or air exchange are limiting, excessive light creates stress rather than better performance.
A PAR meter is the proper tool for checking a new installation. It shows whether the manufacturer’s coverage claim works at your actual hanging height and reveals the weak areas that the eye tends to miss.
LED Lights Need Even Canopy Coverage
Plant response is driven by the light received across the canopy, not by the brightest reading directly under the centre of the fixture. Even coverage makes irrigation, feeding and climate control easier because plants are working under similar conditions.
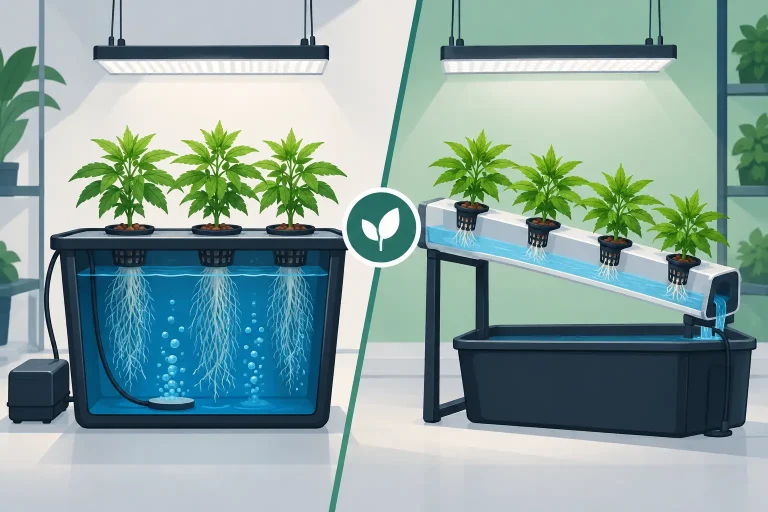
Bar-style LED lights are particularly useful over broad rectangular spaces. Their spread-out diodes reduce central hotspots and place light nearer to the edges. Quantum boards and compact fixtures can be effective in smaller tents, especially where headroom is limited, but may need careful positioning to avoid uneven intensity.
Hanging height is part of the setup, not an afterthought. Raise a new fixture higher than its final position, set the dimmer conservatively and let plants adjust. Lower or increase output gradually over several days while checking leaf posture and canopy temperature. Pale upper leaves, upward-cupping edges and stalled growth can indicate that the fixture is too intense, too close, or both.
Spectrum Matters, but Control Matters More
Most full-spectrum horticultural LEDs use a broad white spectrum supported by deep red diodes. This is a practical choice for growers taking plants from propagation through to finish under one system. Blue-rich light supports compact vegetative structure, while red wavelengths contribute strongly to photosynthesis and flowering development.
Supplemental far-red, UV or dedicated veg and bloom channels can be useful tools, but they are not essential for every grow room. Extra channels add cost and complexity, and their value depends on how precisely you can manage the environment. A well-built full-spectrum fixture with good efficiency, dimming and even coverage will normally outperform a poorly managed multi-channel unit.
Do not choose solely on the number of diodes or on claims about a proprietary spectrum. Check the fixture efficiency in µmol/J, the stated photon output, driver quality, warranty, dimming range and the recommended flowering footprint. These specifications are more useful than a coloured spectrum chart alone.
Heat, Ventilation and Electrical Load
LED fixtures run cooler at canopy level than comparable HID lamps, but they still turn electrical power into heat. A 600 W fixture adds close to 600 W of heat load to the room. In a small tent, this can quickly raise temperatures if the extraction fan, intake and ducting are undersized.
Passive-cooled bar LEDs place much of that heat across a wider area and avoid another moving part. Fixtures with integrated fans may be compact, but fan failure can become a maintenance issue in humid growing environments. Keep heatsinks clear of dust, avoid blocking air movement above the fixture and make sure drivers are mounted according to the manufacturer’s instructions.
Electrical planning deserves the same attention as light choice. Add up the actual draw from lights, fans, pumps, heaters, dehumidifiers and controllers on each circuit. Use suitable timers or contactors for the load, keep connections away from spills and avoid overloading extension leads. A dependable grow room is built around safe, repeatable operation.
Dimming and External Control
A dimmable fixture gives more than a way to reduce electricity use. It lets you run a lower output during propagation, maintain a sensible intensity during hot weather and increase light as the canopy fills the available area. It also gives a margin for correcting an installation that proves stronger than expected.
For rooms with several lights, external control can synchronise schedules and dimming. Some systems can respond to high temperature, but an automatic safety function should not replace correctly sized extraction and climate control. Treat it as protection, not as the main operating plan.
Match the Fixture to the Crop Stage
A single adjustable LED system is usually the most practical route for a tent or mixed-stage room. Start young plants with the light raised and dimmed, then increase intensity as roots develop and the canopy becomes established. Keep an even distance from the top of the plants rather than setting height once and forgetting it.
Dedicated propagation lighting is worthwhile when maintaining frequent cycles of cuttings, seedlings or mother plants. These areas do not need flowering-level output, and lower-power LED lights can reduce heat and running costs while keeping growth compact and manageable.
In a separate flowering or fruiting room, prioritise intensity, spread and build quality. A fixture with adequate output for the area, a quality driver and a realistic warranty is usually a better long-term purchase than an overstated budget model. Replacing a failed light midway through a crop costs more than the difference in upfront price.
Check the Details Before You Buy
Compare the fixture against the room rather than against another lamp’s headline wattage. Confirm its true power draw, recommended coverage at the intended stage, dimensions, hanging requirements and whether the driver can be remote-mounted. In low rooms, a slim bar fixture and remote driver can preserve valuable canopy clearance.
Also consider the practical parts that make the system work: adjustable ratchet hangers, a timer or controller, suitable extraction, circulation fans and a reliable way to monitor temperature and humidity. Light performance cannot be separated from the environment around it.
The best LED setup is the one that delivers consistent intensity across your canopy without overwhelming your ventilation, power supply or plant management. Set it up conservatively, measure where possible, and let the crop tell you when it is ready for more light.